


On this page
Maintaining a pool yourself does not have to be hard. You need the right equipment, a repeatable routine, and a way to catch problems before the water turns green.
Today, I am sharing how I maintain my pool—and how you can do it yourself.
With a robotic cleaner and water monitoring, a quick maintenance check can take 5–10 minutes. Brushing, full chemistry testing, and filter cleaning take additional time. The goal is less work, not pretending there is no work.
What You Need
Start with:
- A pool pole and leaf net
- A brush approved for your pool finish
- A comprehensive test kit, such as a Taylor K-2006
- The chemicals your test results show you need
Know your pool's water volume before dosing anything. A dose that is appropriate for 20,000 gallons can be far too much for a small pool.
The time-saving additions I prefer are a robotic cleaner, a robotic surface skimmer, and an Ondilo ICO water monitor.
Step 1: Remove Debris and Clean Your Robot
Start by removing leaves, insects, and other debris. Use a net, run your robot, and empty its filter regularly.
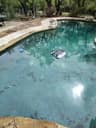
I currently use the Clear UV with the Betta SE Plus surface skimmer in tandem. One handles underwater cleaning while the other collects floating debris. That combination saves me a lot of manual skimming and vacuuming.


I have also reviewed cleaners such as the Dolphin Premier. Whether you use UltraFilters on the Clear UV or NanoFilters on the Premier, the debris still needs to come out of the robot. Think of these as supplemental filtration—not a replacement for the pool's main filter or sanitizer.
Step 2: Check Baskets and Water Level
Check the built-in skimmer basket and pump basket, even when a robotic surface skimmer is running. Empty them as needed.
Keep the water around the middle of the skimmer opening, following your skimmer's instructions. Low water can let the pump draw air; excessive water height can reduce surface skimming.
Turn off the pump and disable automatic restarting before opening the pump basket.
Step 3: Brush the Areas Your Robot Misses
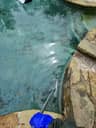
Brush steps, benches, corners, and other missed areas. Clean the waterline with products and tools suitable for your finish.
A robot saves time, but it does not eliminate every brushing job. Pay attention to places where debris settles or algae starts returning. Orenda's algae guidance also recommends weekly brushing to loosen algae and the biofilm that can protect it from chlorine.


Step 4: Check the Filter, Circulation, and Equipment
Record your filter pressure after cleaning, then compare later readings at the same pump speed.
Clean or backwash when the manufacturer's pressure-rise or flow criteria indicate it—not automatically every week. Different filters have different cleaning thresholds.
Look for leaks, unusual pump noises, weak return flow, and equipment error messages. Check any chemical feeder or UV system according to its manual.
Before opening a filter, shut off power and safely relieve pressure according to the manufacturer's instructions. Pentair's filter manual tells owners to disable the pump and automatic controls, open the air-relief valve, stand clear, and wait for the gauge to reach 0 psi before service.
Step 5: Test Your Water—and Monitor It Between Tests
My Preferred Approach: ORP Monitoring Plus a Test Kit
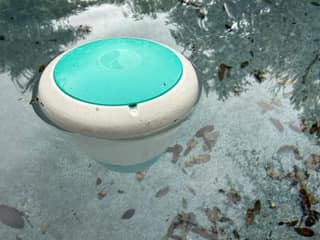
My favorite tool for watching the pool between manual tests is the ICO water monitor. I can check pH and ORP from my phone and see how the water changes throughout the day. ICO takes measurements every hour, giving me much more visibility than an occasional sample alone.
For me, the best setup is ICO for ongoing monitoring and a Taylor kit for verification and full water-balance testing.
ORP means oxidation-reduction potential. It indicates the water's oxidizing potential—not the amount of chlorine present.
That is why I like tracking it: a downward trend tells me something deserves attention. But ORP does not replace free-chlorine testing or guarantee that water is safe to swim in.
I use roughly 650–750 mV as a reference, not a number to chase regardless of my other readings. pH, CYA, water temperature, filtration, and sensor condition can all affect the result. Ondilo's ORP guide explains those variables and recommends checking them before reacting to a low reading.
How to Test With a Taylor Kit
Use a comprehensive kit, such as a Taylor K-2006, rather than a basic kit that only checks chlorine and pH.
Collect water approximately elbow-deep, away from return jets and recent chemical additions. Follow the kit's sample volumes and reagent instructions carefully.
Measure free chlorine and combined chlorine separately with the FAS-DPD test. Compare the pH sample with its color scale. Run the alkalinity, calcium-hardness, and CYA tests when those measurements are due. Hold reagent bottles upright for consistent drops, and record your results.
Taylor's water-testing guidance explains why sample location, depth, volume, and timing matter. A standard pool test kit does not measure ORP. It gives you the chemistry information needed to interpret your monitor intelligently—or maintain the pool without one.
Pool Chemistry Starting Points
These are starting points for a typical outdoor chlorine pool, not universal targets for every finish and system.
| Measurement | Starting point | How to check |
|---|---|---|
| pH | My target: 7.2–7.6, provided overall water balance supports it | Test kit; monitor between tests |
| Free chlorine | CYA-dependent. CDC minimum with CYA: 2 ppm, not a universal operating target | FAS-DPD test |
| Combined chlorine | Ideally zero; commonly recommended below 0.4 ppm | FAS-DPD test |
| Total alkalinity | Common starting range: 80–120 ppm | Drop test |
| Calcium hardness | Common plaster-pool starting range: 200–400 ppm | Drop test |
| CYA/stabilizer | Generally 30–50 ppm for this liquid-chlorine approach | CYA test |
| ORP | 650–750 mV reference, interpreted alongside other tests | ORP monitor |
| Salt, if applicable | Your chlorinator manufacturer's range; its CYA recommendation may also differ | Suitable salt test |
| LSI | Aim near zero, following finish guidance | Calculate from water-balance measurements |
The standard chemistry ranges above are starting references; equipment instructions, sanitizer labeling, and your pool's overall balance still matter. Taylor's technical guidance lists common ranges for alkalinity, calcium hardness, CYA, and other measurements.
Higher CYA can require higher free chlorine. Do not assume 2 ppm is enough for every stabilized pool. Your working target needs to account for CYA and leave enough chlorine to last until the next dose. Orenda's explanation of the free-chlorine-to-CYA relationship covers why those two readings need to be considered together.
Because my pool has a plaster finish, I also pay attention to LSI. It combines pH, alkalinity, calcium hardness, temperature, and dissolved solids to indicate calcium-carbonate balance. Undersaturated water can attack plaster; oversaturated water can deposit scale. Clear water alone does not rule those problems out.
Step 6: Add Acid First When pH Is High
In my example, I correct high pH with acid before adding chlorine.
Say my pH is 8.0, my other balance readings are appropriate, and I am targeting 7.4. I calculate the acid dose using pool volume, acid strength, pH, and alkalinity rather than guessing.
I prefer liquid muriatic acid. Dry acid is another option where it is compatible with your equipment and finish. Orenda's acid guide covers the differences and a measured dosing process.
With the pump circulating, add the measured dose as directed on the label. Wear chemical-resistant gloves and eye protection, and avoid breathing fumes.
Never mix acid and chlorine, add them together, or pour them into the skimmer. Use separate, clean measuring equipment. The CDC pool chemical safety guide warns that mixing incompatible pool chemicals can produce toxic gases or violent reactions.
Let the acid disperse fully and follow the product's instructions for circulation and separation between chemicals. Retest pH before moving on to chlorine. Do not stack acid doses while waiting for an app reading to update.
Already in range? Skip the acid. Adding it is a correction, not a mandatory weekly ritual.
Step 7: Add Liquid Chlorine as Needed
Once the acid has circulated and my pH is confirmed, I check whether chlorine is needed.
Liquid chlorine is my preferred daily sanitizer because it adds chlorine without adding CYA or calcium. It is not inherently stronger than every alternative; it simply avoids those particular additions.
In my pool, I may add chlorine every two or three days. That is my experience—not a dosing schedule everyone should copy.
Use your measured free chlorine, CYA, pool volume, product strength, and chlorine demand to determine the dose. Follow the product label, allow circulation, and retest. Sunlight and swimming activity can change how quickly chlorine is consumed. Orenda's chlorine guide covers measured liquid-chlorine dosing, and the CDC's home-pool guidance explains its minimum chlorine levels with and without CYA.
Weekly Checks Versus Periodic Maintenance
The weekly routine covers debris, brushing, baskets, water level, filter pressure, and an equipment inspection. Check alkalinity regularly while learning your pool's behavior.
Make a fuller balance check—including CYA, calcium hardness, and LSI—part of your periodic routine. A monthly reminder is useful, with additional checks after substantial refilling, chemical changes, or seasonal temperature shifts.
Clean filters and maintain monitor probes according to their manufacturers' instructions, with extra attention when performance changes. Ondilo recommends cleaning the ICO probes every 2–4 weeks and calibrating them on its published schedule.
Free chlorine and pH are not monthly-only tests.
What About a Green Pool?
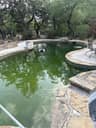
A green pool needs a cleanup process, not just your usual maintenance dose.
Remove debris, test pH, free chlorine, and CYA, correct pH if necessary, and follow an appropriate chlorine-treatment procedure. Brush thoroughly, maintain filtration, and clean the filter as debris accumulates.
ORP can help track changes during recovery, but it is not the finish line. Keep swimmers out until the water is clear and the chemistry is appropriate.

See my complete How to Clean a Green Pool guide for the full process.
My Weekly Routine in One Line
Remove debris, empty baskets, brush missed areas, check water level and filter pressure, review chemistry, correct high pH first when needed, then add chlorine after proper circulation and retesting.
Let the equipment handle repetitive work—but keep checking that it is doing its job.
Frequently asked questions
Can ORP replace my chlorine test?
No. I prefer ORP monitoring for ongoing visibility, but the test kit confirms free chlorine and checks chemistry the monitor does not measure. They do different jobs.
How often should I test chlorine and pH?
Do not wait for the weekly cleanup. CDC recommends checking chlorine and pH at least twice daily, and more often with heavy use. Monitoring provides additional information between those checks.
Why is my ORP low when chlorine is already adequate?
Check pH, CYA, and the probe's condition before adding more chlorine. Confirm measurements with your kit. A low ORP reading does not automatically mean the solution is another jug of chlorine.
How long should I wait between acid and chlorine?
Follow both product labels and allow the first chemical to disperse fully with circulation. There is no universal waiting time for every pool, pump, and dose. In my acid-first example, I also retest pH before adding chlorine.
Do I need to shock every week?
Do not make extra chlorine an automatic calendar event. Use test results, contamination, and water condition to decide whether additional treatment is needed, following the product label.
Does a robot replace brushing or the main filter?
No. It reduces the manual cleaning workload, but you still need circulation, main-filter maintenance, and attention to missed surfaces.
How long should my pool pump run?
There is no single correct number of hours for every pool. Follow your equipment's requirements and adjust circulation for your pool's size, flow, use, and conditions.


