On this page
Cleaning a cartridge filter is mostly rinsing. The parts that cause trouble are the ones around the rinsing: opening a pressurized tank, forgetting how the parts went together, and putting it back without bleeding the air.
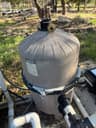
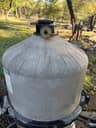
This is the cleaning procedure for our Hayward SwimClear. It is a three-cartridge filter with a top manifold and a band clamp. Other cartridge filters have one element and a locking ring or knob, but the cleaning itself is the same. If you are deciding whether to clean or replace, start with how to change a pool filter cartridge, which covers the full removal and reinstallation.
When the Cartridges Need Cleaning
The gauge tells you. Hayward's cartridge filter manuals call for cleaning when pressure rises 7–10 PSI above the clean starting pressure or when flow falls below what you want. Use the threshold for your model.
Compare readings at the same pump speed. On a variable-speed pump, pressure at 2850 RPM and pressure at 1200 RPM are different numbers for the same cartridge.
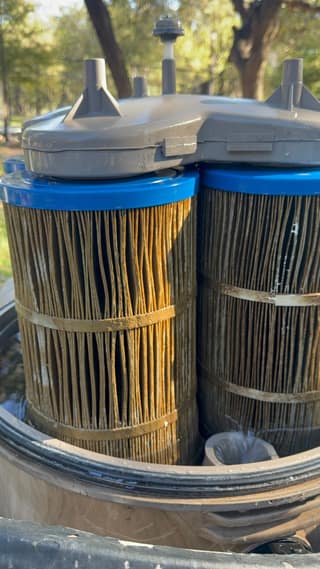
Appearance helps too. The cartridges below had been running through a summer of oak leaves and pollen.
What You Need
- A garden hose with a standard spray nozzle. Not a pressure washer.
- A clean spot to stand the cartridges on, such as a paver or a patch of concrete.
- A cartridge cleaner approved for pool filters if the pleats feel slick or oily.
- Your filter manual, for the closure procedure and any torque spec.
- A phone, to photograph the valve positions and the inside of the tank before taking it apart.
Step 1: Shut Down and Depressurize
Turn off the pump and anything that could start it: timers, automation, app schedules. Cut power at the breaker or disconnect. Then set the isolation valves so pool water cannot flow into the filter while it is open. That matters most when the equipment pad sits below the water level.
Open the manual air relief on top of the tank and wait until the gauge reads zero. Drain the tank through its drain plug or valve. Only then release the clamp, ring, or knob, following the exact steps in the manual.
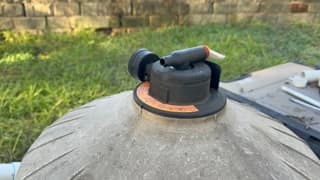
Step 2: Remove the Manifold and Cartridges
Lift the lid off. On a multi-cartridge filter like ours, the top manifold ties the cartridge openings together and has to come off before the cartridges can.
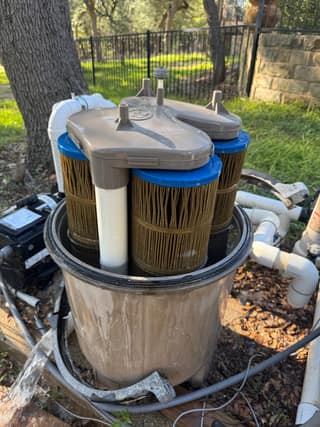
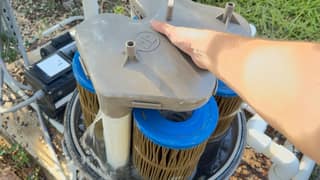
Pull each cartridge straight up and off its seat. Stand them upright somewhere clean. Flush the loose debris from the bottom of the tank while they are out.
Step 3: Rinse Between the Pleats
This is the part people rush. The dirt is not on the surface of the cartridge; it is packed into the folds.
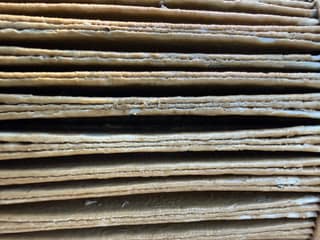
Hold the nozzle so the water goes into the folds, not across them. Work from the top down in a strip, then rotate the cartridge a few inches and do the next strip. Go all the way around, then flip it and repeat from the other end. Do each cartridge the same way.
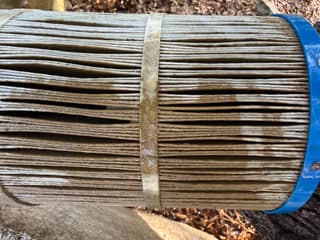
A soft brush is fine where the manufacturer allows it, but it is not a substitute for water getting into the pleats. Do not use a pressure washer. Hayward warns it can tear the fabric, and a torn cartridge filters nothing.
Step 4: Deal with Oils If the Rinse Is Not Enough
Sunscreen, body oils, and some algaecides leave a film that water does not remove. The cartridge looks cleaner but still feels slick, and the pressure does not drop much after reinstalling.
For that, use a filter-cartridge cleaner made for the purpose and follow its label for dilution, soak time, and rinsing. Unicel's troubleshooting guidance makes a point I follow: remove oils before any acid treatment, because acid on an oily cartridge can set the residue permanently into the material. Acid washing is not a routine step and not something I do without a specific reason.
Step 5: Check the Result
A rinsed cartridge should look light gray or off-white between the bands, with daylight visible through the pleats.
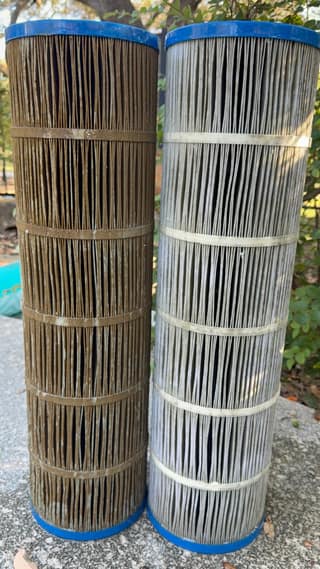
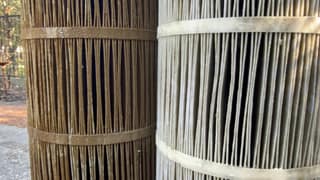
While they are clean, inspect them. Torn fabric, a cracked end cap, or a collapsed center core means replacement, not another wash. A single broken support band is not by itself a reason to replace a cartridge, according to Unicel; look at the fabric and core.
Step 6: Reassemble and Bleed the Air
Seat each cartridge back on its support. Refit the manifold and align it to the center fitting as the manual shows. Clean the tank seal and its mating surfaces. Do not grease a seal unless the manual says to; Hayward specifically says not to lubricate the SwimClear's metal-reinforced seal. Close the clamp or ring using the procedure and torque in the manual.
Close the drain. Return the valves to their normal filtering positions. Leave the air relief open, restore power, and start the pump.
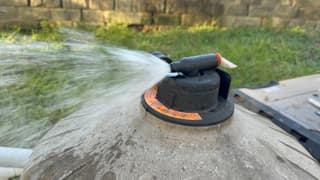
Once the stream from the relief valve is solid water, close it. Let the pump settle at its normal speed and write down the pressure. That number is your clean baseline until the next cleaning.
Keeping a Record
I note the date, the pressure before cleaning, and the pressure after, at the same pump speed. Two things show up in that record over time. One is how long the interval between cleanings runs, which tells me whether something in the pool has changed. The other is whether the "after" number is creeping up, which tells me the cartridges are getting less responsive to cleaning and are heading toward replacement.
If the pressure stays high after a careful cleaning, the cause may not be the cartridges at all. Work through why pool filter pressure is too high before ordering replacements.
Frequently asked questions
How often should I clean pool filter cartridges?
Use the pressure gauge rather than the calendar. Hayward's guidance for its cartridge filters is to clean when pressure rises the stated amount above the clean baseline, typically 7–10 PSI, or when flow drops below what you need. Heavy debris, algae, or a new plaster finish shortens the interval.
Can I use a pressure washer on pool filter cartridges?
No. Hayward warns that pressure washing can damage the filter element. A garden hose with a standard nozzle is enough to clear the pleats if you work slowly around the whole cartridge.
Do I need a filter cleaner chemical every time?
No. A thorough hose rinse handles dirt and debris. A cartridge-cleaning product is for oils, lotions, and scale that a rinse leaves behind. Use it when the cartridge still feels slick after rinsing or when pressure does not come back down after a careful cleaning.
Can I soak the cartridges in bleach?
Follow the cartridge manufacturer's guidance. Unicel and Hayward describe specific soak products and procedures; household bleach is not one of the standard recommendations and can shorten the life of the fabric. Rinse thoroughly after any soak before reinstalling.
Why is the pressure still high after I cleaned the cartridges?
Compare the reading at the same pump speed and valve positions as your baseline. If it is still high, check for closed or partially closed valves, downstream restrictions, or oils left in the fabric. Cartridges that no longer respond to cleaning may be at the end of their life.